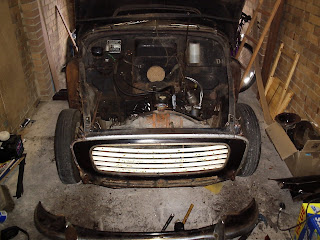
Sunday, 22 November 2009

UURRGHH, IT'S ASBESTOS!!

Aye, so I was sat at work and got to thinking about the heat shield beneath the passenger footwell (as you do). Then it suddenly dawned on me, "hmmm - I bet that's asbestos".

So I posted a question on the MMOC forum and yes, it is Asbestos - bugger. Apparently, it's white asbestos, and depending on its age, the clutch might be asbestos too, and the brake linings (at least when it was new) - but I knew this anyway.


The hole through the passenger footwell (the browny triangle)


The heatshield is mounted above the front baffle of the exhaust.


The white bit inside the heatshield is the asbestos.


Some of the members on the MMOC forum suggested that if its doing no harm, then leave it alone - but because you can see it through the hole in the floor and it might end up killing me, and anyone that rides in the car, I thought I better get rid.

I did a bit reading up on the actual dangers of asbestos, and the safest ways of removing it. I found the health and safety executive has a good section on asbestos at http://www.hse.gov.uk/asbestos/. I also spoke to the local council to see how to dispose of it, who recommended the following:
  • Dampen the area down
  • Wear protective clothing such as overalls (disposable preferably)
  • Wear dustmask and gloves
  • Avoid using powertools to reduce chance of breaking the material
  • Dispose in double-bagged heavy-duty polythene bags, along with the overalls.
  • Seal and label the bags
  • Contact the council to arrange free disposal when next doing one of their "hazardous waste" pickups.
So following advice, I sprayed it with water to dampen down the fibres. Then taped over the hole in the floor, and taped a thick rubble sack to the underside of the car ready.


Once I was ready to catch the heatshield from underneath, I ground off the screw heads that were holding the heatshield on from the inside of the car. I would have preferred to unscrew them, but they were thick with gunk and wouldn't budge. After grinding the heads off, a swift whack with a mallet on the screws knocked them out and the heatshield fell onto the exhaust into the rubble sack I had taped to the underside of the car. I rolled this around the heatshield, then carefully double-bagged it in another two rubble sacks and taped them up. As recommended by the council, I did the same with the overalls I was wearing, and to be sure, my trainers aswell - they shouldnt have been binned years ago anyway.


Heatshield gone

I know it might seem a little over the top for what was just a little bit, but all of the research I did pretty much suggests to take no chances. I've just got to find something else to use as a heatshield now!

Monday, 16 November 2009

NEC Classic Motorshow

Went down to the Birmingham NEC for the Classic Motorshow this weekend, and had my pants pulled down by the parking charges. The Morris Minor Owners Club had their own stand there and had a few cars on show. This is pretty much the standard I'm aiming for with Arthur.


Took this as a reference point because the layout on mine will be similar (a bit different on later models)


Something like this for my next car would be class, but by the time I could afford it I'd look like one of those sad old buggers having a midlife crisis. Might have to aim lower - an MG, or a Triumph or something.

Saturday, 7 November 2009

A good look at the sills

Today I finally managed to get the last of the kickplates/doors off to see how bad things were with the sills.


Nearside rear sill where it meets the rear wheelarch.
Thick packed mud has rotted away the rear wing and the floor.


More of the same on the offside rear.


For the record, those stupid "pig ear"indicators aren't original and are going in the bin eventually.


Sunday, 1 November 2009

Pretty much the same as last time, but on the other side

Today I removed the nearside door and tried to remove the kick-plate but it was welded in place by an old repair. The floor pan is badly rotten where it meets the doorframe, and someone in the past has welded a steel plate on the underside to hide the rot from the M.O.T man. When they welded the repair panel, they also welded it to the kick-plate, and the door finisher (the rail that runs below the doors) which made it a bit of a pain in the arse to get off.

I removed the door finisher with a bit of grinding, which gave me better access to the welded edge of the kick-plate. More grinding and a bit of wacking with a mallet, finally got the kick-plate off...


It's hard to tell from this photo, but the condition of the box section isnt bad.


A tiny bit of corrosion towards the front, but its hardly anything. The door finisher removed is lying on the floor.


View from underside of the floor. The welded repair is the more rust coloured panel along the edge of the floor underside.


The nearside rear sill isn't too bad, considering the state of the kickplate that was covering it.


Still, could be easy to repair - if its worth it.

Saturday, 24 October 2009

An inspirational kick up the arse

Since I found the holes in the floor a while ago, I've spent my time basically doing nothing. I was so pre-occupied with sorting the cross-member ends, that I had stopped everything while I planned and replanned how I was going repair them. This just overfaced me and nothing got done.

An inspirational kick up the arse from my dad made me realise that there is plenty I could be doing, so for the past few weeks I've been busy with an angle grinder.
Both front wings are shot, and have to go. The headlight surrounds are made of chicken wire and filler, and both wings are rotten all up the A-post.


The fixing bolts for the front wings are a little tricky to get to, and they're covered in over 50 years of muck, so I cut away large sections to give better access to the bolts.


There is a little corrosion along the top of the inner wing, but nothing massive. These can probably be plated over.


With the wing off, I could get a better look at the inner wing. The hole is where the jacking point for the car is supposed to be. Definitely need a new panel for this.


The left side doesnt have any corrosion along the top of the inner wing, but the jacking point and door post cover are badly shot.


Definitely need a new panel or maybe 2 for this.

Jacking point shot on this side too. A-Post cover plate very badly corroded too.


Both front wings off the car, and the bumper removed. Space to work is pretty tight, so just removing these is a massive help.


The silver (and rust) coloured plate is the kick plate. This covers a steel section that is important for the structure of the car, and is often corroded. I need to take this off to see what the state is.


Not too bad. There's definitely corrosion along the bottom of the section, but it could have been much worse.


Removed the drivers door to get a good look at the A-post. Everything looks alright as far as I can see, though I'll get a better idea when I remove the cover plate on the inner wing.


After removing the wings, I kept the light lenses and metal surrounds as these are still good (though would need re-chroming). I want to keep as much original as I can, especially since a lot of new replacements are not as good as recycled originals. I also cut a few sections from the front wings. Might come in handy for practice welding, or for plating over small areas.


...the rest waiting to be scrapped.

Monday, 20 July 2009

First Job Done, but any idiot can pull something apart.

For the past few weeks I've been stripping out the inside of the car, to prevent damaging anything when the major work starts, and to get a good look at the car to see what needs doing.

The seats are leather and a bit tired, so I cleaned and treated them before putting them into storage. Everything else should be fine until I'm ready to clean them - I can do this indoors, so will probably leave this for winter when the garage is freezing cold.

I removed the steering wheel because it was getting in my way, and since its in such good nick, I didnt want to risk breaking it by bumping it. The car isnt going anywhere so it wont be needed anyway. To get a good look at the bulkhead from the inside and get good access behind the dash, I had to remove the parcelshelf, which meant removing the steering column, and the heater. To make sure everything goes back in the right place, I've taken photographs of everything before I removed it, and attached tags to cables, pipes, and wires to make sure I connect them back correctly.

With everything out, its easier to get a look at the state of the floor, and have a good poke at the small cracks that were there (which are now big holes). The floor above the main crossmember is rotten through (below the driver and front passenger seat), and the crossmember itself which supports the floor has also corroded at both ends.

Both front footwells are rusted through, the rear passenger footwells are also rusted through near the doors, and the sill beneath the centre door pillar (both sides) is also rusted. I'm wondering if I should just replace the whole floorpan, instead of patching the existing one. Removing the whole floor would make it easier to repair the cross member, and a whole new floor will give me peace of mind, so maybe I will. But on the other hand, I'm tight. The jury's still out on that one.

Here's some photos of current status, and closeups of the holy floor.

Looking through the back seat into the boot


Both nearside doors with the door cards removed


Steering wheel removed, glove boxes, parcel shelf, heater, last bits of tatty old carpet, and the seats all out.


An attempt at being a bit arty. One of the spare wheels. It has two, I dunno why.


Hole in the floor beside drivers door above the main crossmember

Hole below the rear off-side door. It has these on both sides.


View looking into the car from the boot


I found this 2 shilling coin when I removed the back seat.

Friday, 19 June 2009

Registering the car with the DVLA

In 1983, the DVLA set a deadline for all cars to register with their vehicle database and for a new type of logbook (v5). As my car has been sat in a barn since 1976, it missed the deadline which means the DVLA have no record of it, and until its registered I can't get it taxed, tested, or insured.

To apply for the original registration, I had to ask for a representative from the Morris Minor Owners Club to verify the date of manufacture, and general spec was original. Then I had to complete a couple of forms, and send to the DVLA with additional proof that the vehicle did have the registration I was applying for (sent a copy of the original logbook).

I sent this off about two weeks ago, and today, I heard back from the DVLA and they have accepted the application and issued a new V5C for the vehicle under its original registration. I dunno why, but I like the idea that the car is keeping its original number, 53 years after it was first issued.

Thursday, 14 May 2009

Arthur's Arrival

As a kid I had a pretty wierd fascination with Morris Minors, all started by my dad when he restored a 1000 Traveller when I was about 8. Luckily I grew out of it, though recently my dad bought a Rolls Royce Silver Shadow to put back on the road, and it got me thinking that I fancied restoring something myself.

After a surprise birthday present from the missus and my parents, I'm now the proud owner of a great little project car that I've decided to call Arthur (no reason - it's an old car, and Arthur sounds like an old mans name).

Arriving on the back of a trailer


Its a 1956 series two, 4 door saloon, and has been off the road since 1976 when the owner decided to store the car under a carpet in a barn and then forgot about it. The car sat there for over 30 years until the owners cleared out the barn in 2008 and the car was found.

It doesn't look too bad arriving on the back of a trailer in the sunshine, however there is a bit of work to do. Aside from the general stuff you'd associate from a car that hasn't moved since before I was born (cracked tyres, crappy brakes, window seals perished), most of the work is the usual stuff for Minors (wings, patches in the floor, etc). Unfortunately I wont have the joy of getting it started for the first time, as this was already done by previous owner, but I'm going to give the engine an overhaul anyway.

I'm also keeping a blog of the whole project from start to finish. It'll keep me busy during lulls while saving for parts, and hopefully people might reply with some friendly tips and advice on any specific problems I'm having, or suppliers of elusive parts.

Here's some pictures before I get started: